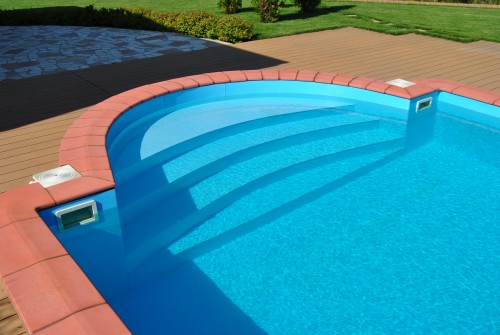
How wonderful in the summer to have in the courtyard of the house, the dacha has its own pool, which in hot weather will serve as a wonderful vacation spot for the whole family. Today, the market offers various types of finished pools that differ in size and cost. However, the unique properties of polypropylene, which has become widely used relatively recently, allow you to make the pool with your own hands in a short time that meets the preferences of individual family members, and save money resources.
Content
Why polypropylene
Polypropylene pools can be built both in the open space and indoors, thanks to a number of advantages of this material:
- light weight;
- high impact resistance;
- excellent elasticity;
- resistance to ultraviolet rays and chemical compositions;
- corrosion inappropriateness;
- environmentally friendly material;
- the ability to use at low temperatures (up to -80 ° C).
However, the main advantage of polypropylene is the construction of structures of any shape, size and complexity.
Among the mass of positive aspects, it is worth highlighting the only drawback of this material - quite expensive equipment is used to weld polypropylene joints.
Types of polypropylene pools
1. Frame - slightly deepened into the ground, or installed on its surface.
Advantages and disadvantages:
- mobility;
- the presence of a flat site for installation;
- dismantling for the winter season;
- there is a high probability of mechanical damage;
- high cost.
2. Pound - the pool bowl is completely buried in the ground.
Advantages and disadvantages:
- simplicity of service;
- durability;
- the need for dismantling is excluded;
- low cost;
- the complexity of earthwork.
Choosing a place for the pool
To extend the operational period of the pool and save water relatively clean will help a competent approach to choosing a place for the future pool in compliance with the following conditions:
- Lack of trees. In arid weather, roots strive for any source of water, while damaging the waterproofing of the pool. The leaves flying from trees will also cause a lot of problems, since they will have to be constantly cleaned before swimming. Otherwise, the leaves decomposing in water will create a favorable basis for the formation of algae.
- The direction of the wind. The pool is placed in such a way that the garbage that falls into the water is nailed to one edge, and does not spread over the entire surface of the water surface, it is easier to remove it.
Polypropylene Polypropylene Polypropylene manufacturing technology
Necessary materials and tools
- cement;
- gravel;
- wire;
- sand;
- reinforcement;
- concrete mixer;
- boer;
- level;
- hammer;
- roulette;
- boards for formwork;
- nails;
- geotextiles;
- Waterproofing material (extruded polystyrene foam);
- ribbon;
- plastic pipes;
- polypropylene sheets (thickness 5-15 mm);
- extruder+2 nozzles for welding;
- construction hair dryer;
- metal racks.
Pit
- We drive pegs around the perimeter of the future pool and pull the rope.
- We fix the height of the side.
- The jack of the pit exceeding the size of the bowl by 70 cm from all sides, while we increase the depth by 60 cm.
- We put geotextiles on the bottom of the dug pits.
- We fall asleep by 30 cm with a layer of gravel, tamp it.
- We make a lattice made of reinforcement with a diameter of cells about 25 cm.
- We fasten the grill over gravel, to a height of 7-8 cm.
- Given the height of the sides, set metal racks, instead of the beacons.
- Pour concrete solution with the entire area 30 cm thick.
- After hardening the concrete floor, we lay geotextiles, and on top - sheets of extruded polystyrene foam, fastened with adhesive tape.
Polypropylene pool
- We put polypropylene sheets on foam polystyrene.
- We weld the bottom of the bowl with a hand extruder, starting on the back, we turn it over.
- On the inside, we pass the seams with a hairdryer using an oval flagella.
- On the manufactured bottom, mark the location of the walls of the bowl.
- Install the walls of the bowl, grabbing a hairdryer inside.
- We boil the seams of the joints of the walls with the bottom of the bowl with a hand extruder, and then inside with a hairdryer around the perimeter.
- To the walls of the bowl from the outside, weld the ribs of stiffness with a welded twig using a hairdryer, with a step of 60 cm.
- We warm the walls of the bowl of polystyrene.
- In the ribs, drill holes after 50 cm and insert the reinforcement into them around the entire perimeter of the bowl.
Installation of embedded elements
- We mount nozzles for rolling water, bottom drain, skimmers, spotlights.
- We insulate the pipe paved, fixing with tape.
The final filling with concrete
- Around the pool we build the formwork tall and 30 cm wide.
- Pour water into the pool in the height of the manufactured formwork.
- Pour the formwork with concrete to the same height.
- After a day, raise the formwork by 30 cm, add the water into the bowl and again pour concrete, producing such manipulations daily until the level of ground reaches.
- The filling of the space free from the formwork around the pool is performed as the formwork is rising, or after the completion of the concrete pouring.
It remains to improve the site near the pool.
Following the phased description of the entire process technology, it is very simple to build a durable polypropylene pool of polypropylene.


