There comes a time when it is necessary to make an important decision - to throw out the old furniture. It has long been “does not fit” into the modern interior, but still something does not allow the junk to be attributed to the landfill. And rightly, it is better to update the old closet than to throw it away.
Content
We are talking about the old solid wooden furniture. Of course, if you have a Chinese -made product made of pressed sawdust and plastic at home, then it will be much more difficult to restore it. But if you have a wooden “Soviet” cabinet, then you just need to breathe a new life into it.
Consider the popular ways to update furniture:
- Restoration in the style of "Ar-Deco".
- Decoupage.
- Covering a self -adhesive film.
- Craquelure.
Restoration "Art Deco"
A bunch of ideas always revolve in my head, and sometimes it is so difficult to realize them! First you need to think about how to make your updated cabinet harmonize from the design of the room. Select a suitable shade of paint and select the appropriate accessories.
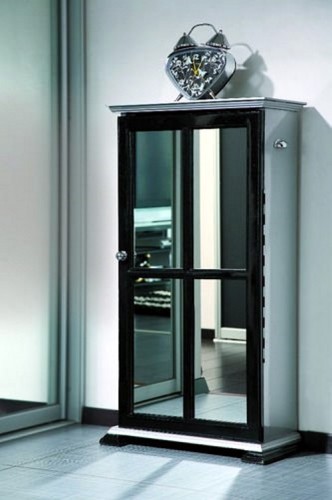
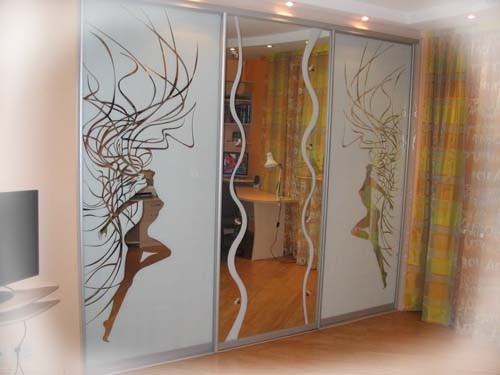
Look at this photo, our updated closet will look like this:
What tools will be needed:
- grinder (or sandpaper with different grains);
- screwdriver;
- screwdriver;
- construction narrow spatula;
- fretz or painting roller;
- brush;
- glue;
- self -tapping screws.
It is necessary to purchase the following:
- Putty (for working with wooden surfaces).
- A primer.
- Enamel in cylinders (buy car black and metallic);
- Varnish.
- Furniture tape.
- Glass (mirror).
Before starting work, carefully examine the closet. All the shut -up fastenings must be pulled up, and replaced the old nails with self -tapping screws. If there are hanging loops, it is advisable to either twist them, or replace them with new ones. In addition, when installing a new fastener, the connection place is additionally processed with glue. If rust has appeared, it must be removed (you can clean or removed with a solution for removing rust).
Work plan:
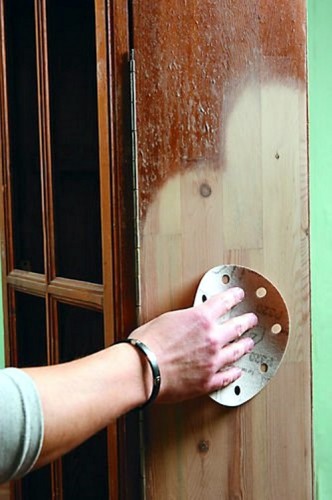
- Remove the old coating with sandpaper or grinding. Perhaps, after removing the top layer in the tree, you will find a bug-two. In this case, the surface must be wiped with an antiseptic.
- Carefully inspect the closet. If dents and chips are found, they can be “treated” like this: to primed the surface, let it dry and fill them with putty mixture. Apply it with a thin layer, because if it is dense and thick, then the mixture does not dry, and will crack.
- Cracks and deep scratches can be filled with furniture wax. It can be of different types: hard, soft, as well as colorless or with the addition of a shade. Wax needs to be warmed up and cracks. If you are going to continue to dye the surface of the cabinet, then work with a colorless wax. You can clean up minor defects with sandpaper.
How to paint an old closet?
After all the damage is eliminated, you can prepare the cabinet for painting. Want to transform your furniture to such an extent that even your relatives do not know? First you need to clean with sandpaper with putty and apply a layer of primer mixture. This important part of the work cannot be passed, because the paint on an unrealized surface may lie unevenly.
How to paint a closet:
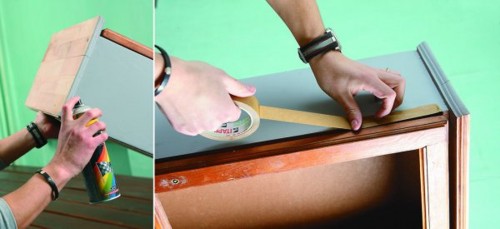
- First take a spray can with the main color. We have chosen the color "metallic". Limit with construction tape that part that will not be stained in the main color.
- Apply the main color to the surface first and wait until it dries.
- The next stage is the application of the second color.
Immediately after staining, you will see how much your furniture will be transformed.
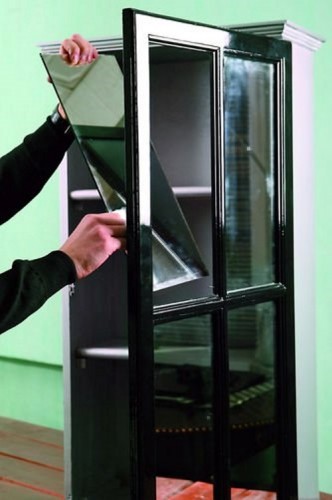
Then proceed to the assembly: take the mirror glass and insert it into the cabinet door, screw the fittings.
Decoupage of the cabinet
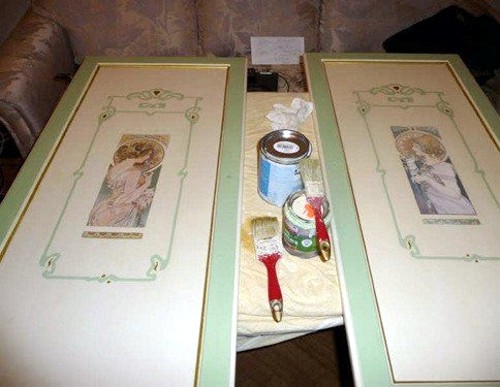
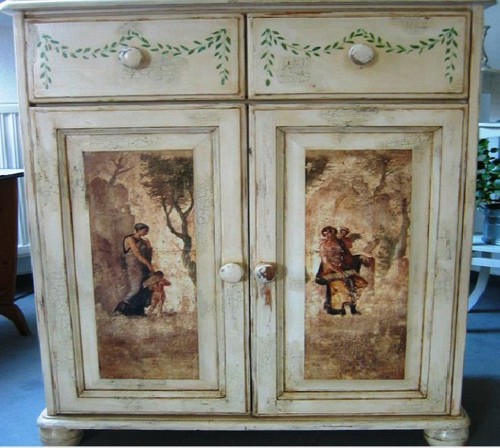
The restoration of the old cabinet will bring you true pleasure if you choose the decoupage technique. Currently, its popularity is increasing day by day. The principle is as follows: with the help of the selected picture, the design of your furniture changes completely.
What tools and materials are needed:
- wooden primer;
- paint (acrylic);
- acrylic varnish (colorless);
- PVA;
- sandpaper;
- painting brush;
- roller (if the cabinet area is large);
- picture (you can take a napkin with a pattern, cut the picture you like from the magazine or order photo printing).
The work plan is as follows:
- Clean the surface with sandpaper.
- We apply a primer mixture and leave it until completely absorbed for a day.
- We stain the closet in the selected color (when selecting color, focus on the shade of the selected picture).
- We expect that the paint is completely dry (one or two days).
After the preparatory stage, we proceed to the most responsible moment. We cut out the selected image (do not forget to choose it in color, size or on the topic of your interior).
We apply a cut picture to the surface and see what happens. If you don't really like it, then try another picture. Mark it with a pencil. Then, in order not to get the effect of glued paper, and the effect of painting, you need to neatly thin a five to seven millimeters from the back of the picture on the edges. Thus, we will turn out a very thin, literally papyrus edge.
How to stick the image correctly:
- Lower the picture into a container of water. Let the paper soak well.
- Put it on a towel and cover it on top with a free edge.
- Using a brush, apply glue to the place where your picture will be.
- Attach wet paper to the surface and carefully spread it from the center to the edge. Make sure that the fit is perfect, without "wrinkles."
This is how the images should be glued.
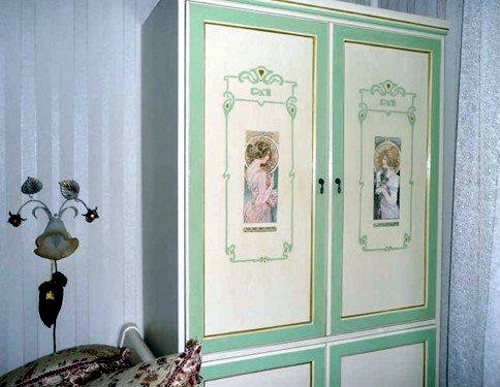
As a result, you will get a delicate neat cabinet:
Restoration of the wardrobe
The old wardrobe can be updated with a self-adhesive film. It is matte and glossy, with colored patterns, as well as “under the tree”, “marble”, “metallic”.
The film is good to cover not only the outer part of the cabinet, but also the shelves and boxes.
Work plan:
- The surface must be prepared in advance and cleaned of dust with any detergent. Pour a little warm water into the basin, drip the detergent and foam. Wipe the cabinet with soft, well absorbing moisture with cloth.
- If the doors and side parts of the wardrobe have roughness, chips or cracks, first put them in. Do not forget to apply a primer mixture.
- A special tool for degreasing process the surface.
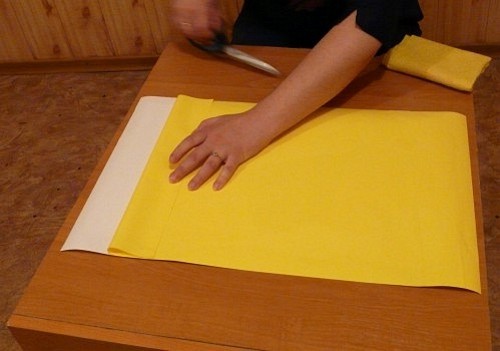
- Take the film and outline the desired size from the inside. Do not forget to add a couple of centimeters for allowances at the edges.
- To glue the film, carefully remove the protective paper, but not completely, but only ten centimeters.
- Fasten the released sticky layer on the surface. With the help of soft fabric or a special spatula, carefully defeat the film. Make sure that air bubbles do not appear.
- Thus, step by step gently remove the protective paper and glue the film.
- If the bubbles have formed, and there is no way to remove them, then you can gently pierce them with a needle and release air.
Technique Krakelyur
This type of furniture decoration is its simplicity. Special material costs for the restoration of the old cabinet are not required.
Necessary materials:
- pVA glue;
- acrylic paint;
- krakelular varnish (one -component);
- acrylic matte varnish;
- a wide brush.
How to restore the old cabinet Krakelyur technique:
- Prepare the surface, clean and apply a primer in two or three layers, dry.
- Apply paint (the main color should be darker because it will occur through cracks). Wait for its complete drying.
- Quickly and evenly cover the entire previously painted surface with Krakelyur varnish. The thicker the layer, the better and larger the cracks will be. Dry the varnish to such a state that it sticks to the fingers, but at the same time leaves no trace.
- Apply the second tone of paint (light). After a certain time, a characteristic “net” will appear.
- After completely drying the paint, cover the surface with acrylic varnish.
How to work with varnish:
- when buying varnish in the store, choose a liquid, because the viscous substance will go worse, and when dried, the layer will be uneven;
- do not shake the varnish before application, because air bubbles can ruin your work;
- if you work with the material for the first time, practice in advance on the other surface to understand the principle;
- in the room where you are going to work, it should not be cold and damp;
- in a few hours, at the start of work, do wet cleaning in the room, so you will get rid of small debris and particles of dust on the drying surface.
The principle of working with two -phase lacquer Krakelyur
If a drawing is glued to the cabinet doors that you do not want to paint over, then you need to use a two -phase Krakelyur varnish.
The technique of restoration of the cabinet with a two -phase cracker:
- Take a two -phase varnish. The first composition of the “ages” surface, the second - forms cracks.
- Oil paint.
- Varnish (acrylic).
- Brushes (average size, two or three pieces).
- Bitumen or colored grout.
- Foam sponge.
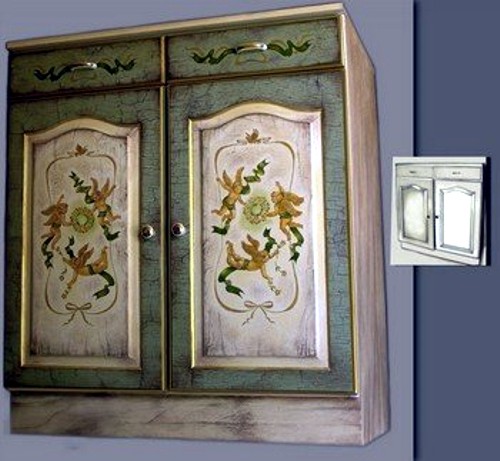
The surface must be covered with the first layer of varnish, dried. Quickly apply the second composition of varnish and dry the surface. When cracks appear, they need to be treated with grout. Use a foam sponge. The color powder will “ennoble” the pattern of cracks and will give the closet a completely different look. Then apply a layer of varnish and leave until completely dry.
What does the old wardrobe look at the photo:

