Potent business has recently been very popular, especially among children. This is not only interesting, but also develops motor skills, coordination of movement, attentiveness and determination. In addition, it will be very important for the child to see the final result of his work. For a pottery, equipment is necessary, which simply can not do without. Necessarily in the manufacture of clay products you need a stove for their firing. Not burned clay will not gain a normal fortress and simply crack. Another indispensable attribute of the potter is a pottery. Without it, it is impossible to make even cylindrical details.
Content
It makes no sense to buy a pottery circle for a child. Firstly, it is far from the fact that the young hobby will not disappear in a few weeks, and a rather expensive unit will simply take a place in the garage. Secondly, pottery are not too cheap, especially models with an electric drive. The way out of this situation may be renting a pottery or making it with its own. About how to make a pottery with your own hands - further in the article.
Types of pottery
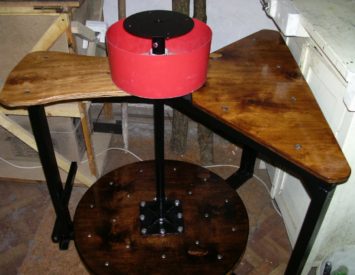
The designs of the pottery circle, according to historians, are already several thousand years old. During this time, it has practically not changed. It is a whole wheel of solid material (it can be wood, stone or steel), on which a clay blank rotates with a given frequency. When rotating, it is processed manually or using a special tool.
There are pottery circles by type of drive, thanks to which the workpiece rotates. They can be:
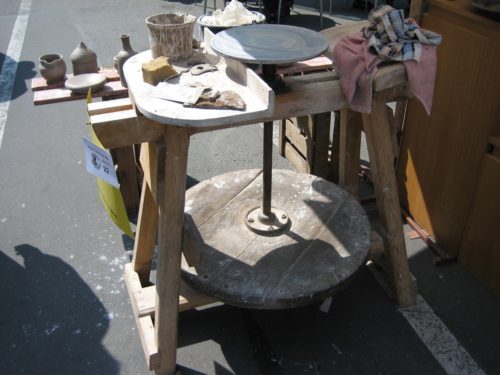
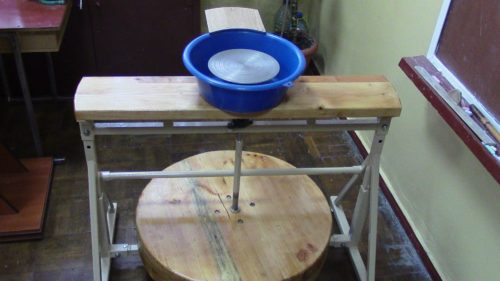
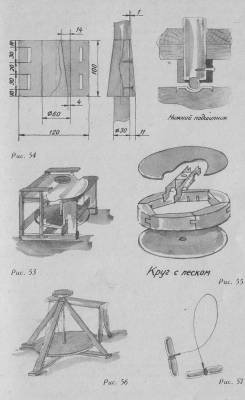
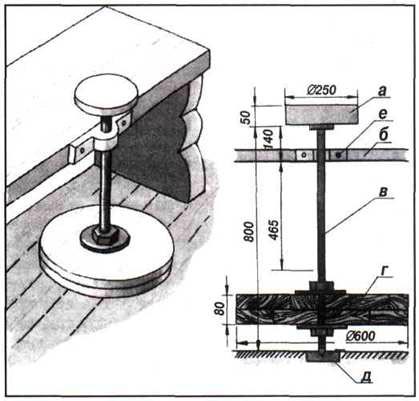
- Night. The simplest design of the pottery circle, which has been used for many hundreds of years. It is a shaft on which from different ends the drive and working circles were planted. The rotation of the drive circle was given by the potter himself, pushing him clockwise with his feet. This design is not too comfortable, as it requires the use of significant efforts when working. Do -it -yourself foot potter is made very simply, which is its main advantage.
- Mechanical. Such a circle was developed by the famous English potter Bernard Lich. The design of the lich was quite successful, so the industrial production of such circles began in the middle of the last century. The principle of operation of such a circle is based on the transformation of the reciprocating movement of the pedal into the rotational movement of the shaft of the circle due to the curve mechanism. It was much more convenient, it was possible to more accurately adjust the rotation of the circle, which is very important when processing materials with various properties.
- Electric. With the advent of electrical drives, the mechanization of pottery took a step forward. Thanks to such machines, the potter no longer needs to make an effort to rotate the part, but you can directly focus on its processing. The exact adjustment of the rotation speed of the part also became possible. In addition, the dimensions of the machine have become much smaller.
The design of the electric potter's circle
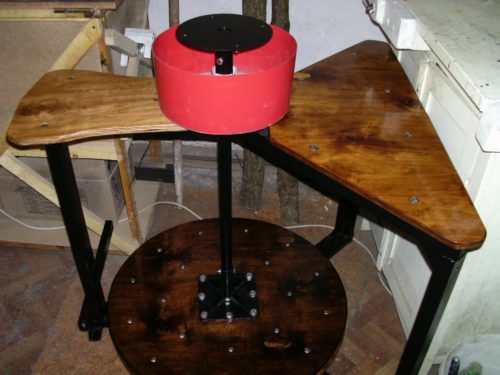
The design of the electric pottery circle is quite simple and its installation is not particularly difficult. For the implementation of the project, the skills of handling electrical devices, installation of electrical equipment, welding work are needed. If all this is, you can take work.
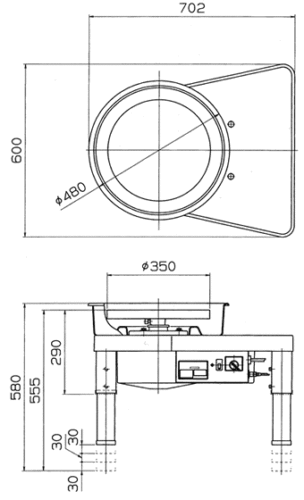
The design of the circle consists of several main nodes:
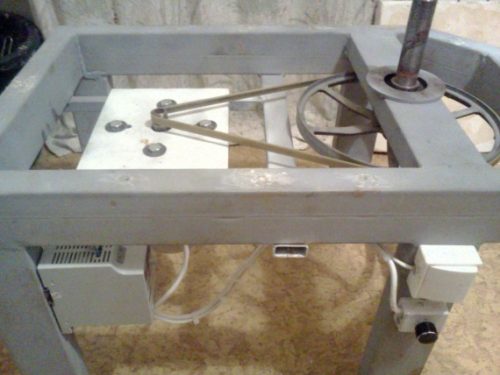
- Bed. Welded metal structure, on which all the nodes of the machine are attached.
- Electric drive. Small power electric motor for rotation of the shaft.
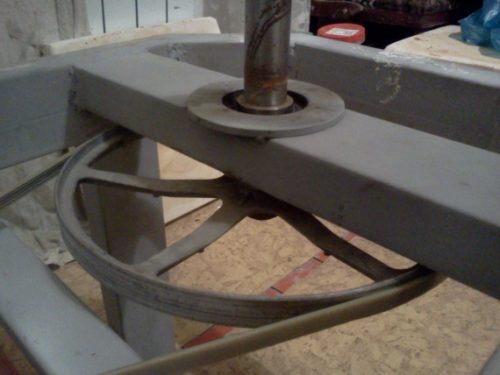
- Leading and led pulleys. Designed to transmit torque from the electric motor to the pottery circle. Pipes are connected using a wedge -shaped belt.
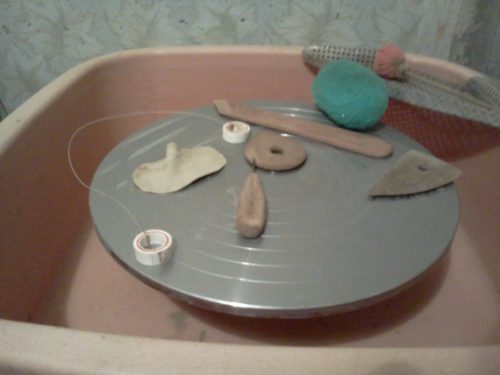
- Circle. The steel disk of the required diameter on which the workpiece is directly processed.
- Electrical equipment. Frequency converter, power regulator, circuit switch.
- Drive shaft with a hub and bearings. Serves to transmit torque from the driven pulley to the circle directly.
- Production bowl. Designed to protect the premises from dirt during clay processing. Under the influence of centrifugal force from rotation of the circle itself, poorly fixed pieces of material can simply fly apart. To prevent this from happening, the circle is placed in a production bowl, most often made of plastic.
Preparation of materials, tools and spare parts for a pottery with your own hands
Before starting work, it is best to make a drawing of a pottery with your own hands. This will help determine the required amount of materials and outline the sequence of work. For the construction of a simple electric potter’s circle with your own hands, you will need:
- Profile pipe in size 80x40 mm. Designed for the manufacture of a frame frame. To install the engine suspension design, a smaller pipe is used.
- Engine. The engine should be low -power (not more than 500 W) with a maximum speed of up to 1,500 rpm. If there is a working, but unused washing machine, the drive mechanism can be taken from it.
- Pipes. The drive and driven pulleys for the belt can be taken from the same washing machine. In some cases, if the engine is used by another, you can train the pulley under the belt directly onto the rotor shaft. The driven pulley should be of greater diameter.
- Potter circle. It is made of sheet steel up to 10 mm thick, preferably, stainless steel. It is cut out and processed on a lathe. The planhab should be suitable for the diameter of the drive shaft.
- To combine the driven pulley and the pottery, the shaft and bearings are used. The most suitable bearing is the hub from Zhigulevskaya nine. Its advantage is that when the clip is clipping, it itself is centered. To install it, it is necessary to grind the glass, and weld it into the crossbar of the frame.
- Shaft. The shaft is pulled out to the size of the pulley.
From the assembly tool you will need:
- Welding apparatus with a set of electrodes.
- A grinder with a set of circles for cutting metal and stripping welds.
- Drill for drilling holes.
Making a potter's circle with your own hands
Work order:
- First of all, it is necessary to boil the metal structure of the pottery frame. It is a rectangular frame from a profile pipe with welded legs. The connection of pipes is best done at an angle of 45 °. To do this, the ends of the pipe are cut by a grinder.
- Closer from one of the edges in the middle of the frame, a crossbar from the same pipe is welded, only located with a larger surface up. It will serve as the basis for installing a shaft and a plank.
- After that, the supporting structure is welded at the engine installation site. It consists of a transverse pipe, which is welded to the opposite pipes of the frame, and two longitudinal, which are welded perpendicular to the transverse.
- Directors and runners are installed on longitudinal pipes. The engine is attached to them. Powders are needed in order to change the distance from the engine to the driven pulley, thereby increasing or decreasing the tension of the wedge -shaped belt.
- The drill of a homemade potter, made with your own hands, is a sheet of metal, in the middle of which a hole for the shaft is drilled, and fasteners. It is better to do this on a radial-warlord machine. It will be problematic to drill a hole under the shaft with a manual drill.
- The engine is attached to the fasteners. Salads are made of steel, with milling grooves and welded to the supporting structure. Now the engine can “walk” back and forth, changing the belt tension.
- The next step is welded to the installation of the shaft bearings, after which all the mechanics are collected: the shaft and drive pulley are installed. Be sure to check the centering of the pulleys of the engine and the drive shaft. Their centers should be on one axis, and the pulleys themselves should be in the same horizontal plane. Otherwise, the belt will be distorted, which will lead to its rapid wear.
- Next, a protective casing is installed on the machine frame. As the latter, you can use any plastic container (large dish or bowl). Holes for fasteners and one hole for the shaft are drilled in it, on which a pottery circle (planhayba) will be attached. After that, it is installed in place.
- The last thing in the assembly of the mechanical part of the pottery is the installation of a planhab.
- After the mechanical part of the pottery is collected, you can proceed to the electric part. It consists of several parts:
- frequency converter;
- switch (conventional light switch);
- adjustable resistance.
The engine is directly connected to the frequency converter. One of the suitable models of the latter is Vesper-8100. It allows you to adjust the engine speed from zero to 1,500 revolutions per minute. In this case, the engine power does not fall. A variable resistance (rheostat) is connected to the frequency converter, which allows us to change the number of revolutions by the user. Connection of the reostate to the converter is carried out according to the scheme, which is indicated on the device itself or in the guide for its operation. The voltage in the network is turned on by a conventional switch that breaks the alternating current phase. Instead of the latter, it is better to install an assault rifle on 10A, which will serve as an additional protection of the network.
