Everyone who wants to build their own housing, sooner or later faces the choice of roof, and so that it has been durable and not much "hit the wallet." It is possible to do this by carrying out all the stacked work personally. Taking advantage of the right, and most importantly, the technologically advanced roofs of the roof of a flexible tile, there is a high probability of performing work efficiently. When the question of choosing one or another type of flexible roof tiles is faced, then it is worth noting that anyone (even the most expensive and high-quality) shingle will not fully fulfill its function, if you do not comply with the technology, which will allow him to serve us as much as possible to him . So what is the roof of the flexible tile, and what difficulties may occur when it is laying, we will try to figure out and misuse a single important point.
Content
Product specifications
The technical component of the roof of the roof of flexible tile implies many features and to better understand them, we should learn more about this material.
Distinctive features include:
- long service life (up to 40 years);
- low cost (in comparison with ceramic);
- convenience during transportation (gears belong to light roofing materials, weight from 8 to 11 m2).
Today, the process of production with the participation of flexible tiles occurs in compliance with the latest technologies on modern machines. The composition of the composition of the soft tiles is a glass cholester, with a modified bitumen applied on both sides. To protect against weather factors, destructive for the ultraviolet bitumen, as well as an increase in operational terms, a mineral crumb is applied on the front side of the shingle in various color variations. More often on the bottom of the plate is a small layer of self-adhesive bitumen, which is protected by a thin silicone film.

Also, a soft tile is distinguished by several types of coating (copper and zinc titanium), but the traditional leader still remains a roof from bituminous tiles, which, due to its elasticity, facilitates the design and installation of more rounded roof projects.
The main components of bituminous tiles or shingles:
- The upper (facial) layer is a stone crumb (due to the fact that the stone is made of a special side of the stone, it does not crack, has excellent moisture-proof properties, as well as a staining rack at relatively high temperatures, without changing the color for a long time).
- The middle layer is the synthetic component (the glass cholester, which gives the plate, the excellent properties of "on bending" and "on the gap").
- The bottom layer is a modified (or oxidized) bitumen (it allows the shingle to change in size due to seasonal and climatic temperature differences and provides high fire resistance).
Since the gears belong to the piece goods, it allows him to abandon increased elasticity in favor of rolled materials, as it does not form at the installation to a fully solid coating of the working surface. When one or more sheets deforms, the probability of damage to the solid surface coating is significantly reduced.
Advantages and disadvantages of flexible tiles
Every year the soft roof is becoming more popular. What is it connected with and what basic positive features can be allocated? What causes the ever-growing popularity of bituminous tiles? Below we will try to understand all the advantages and minuses of this roofing material.

Advantages of bituminous soft tiles:
- Protection against the influence of adverse weather conditions (a soft bituminous roof has increased resistance to deformations and faults associated with changing temperatures and other weather factors).
- Environmentally friendly - all the main components of the shingle contain materials of natural origin, in turn, not affecting the environment.
- Fire resistance - a sheet of flexible tile has in its composition resistant to ignition materials, which allows you to protect your roof from the fire.
- Low weight - allows you to experiment with forms and sizes due to the light of the material, without unnecessary loading on the rafter.
- Resistance to external damage - when the roof is ready, you can easily move on it, without fearing to sell or disrupt the sheets of bituminous tiles.
- Soundproofing - you will feel comfortable, living under the roof of soft tiles. Due to its excellent noise absorbing properties, neither rain, nor hail you no interference.
In the finishing materials market, the bituminous tile has a huge selection of forms and variations of color solutions capable of giving the housing painting and originality.

If you still decided to install the roof of a flexible tile with your own hands, then our instruction will help you do everything as correct as possible. But it is worth noting that any, even the highest quality and expensive soft roof, will not serve the time for it, if the main rules, norms and conditions will not be observed. Having understood in all subtleties, we attributed the complexity of the installation to its main disadvantages.
Flexible Tile Technology
The correct installation of the roof of the flexible tile is the key to subsequent long-term operation, otherwise it is sooner or later the errors will let yourself know.
The main stages when laying flexible tiles are considered:
- Foundation arrangement for roofs.
- Setting the lining layer.
- Assembly and installation of endanda, ends and cornice.
- Laying tiles.
- Installing adjoins.
- Installing the tiles to the rustic building.
Preparation of base and ventilation
To perform roofing work with quality, you need to approach the preparation of the foundation. Starting with the arrangement of the crate, moreover, it will be lattice or solid, to solve you. Often for the crate, as for the rafter system use wood. For this, it is usually taken in a streaked boards with a thickness of 2-2.5 cm.

Immediately, we note that for a longer service life of the cage, one should first treat all the wood flaky-protein. This will increase its refractory properties and for many years will disgrace with any wood insect. For the flooring of the crates usually take moisture-resistant faeer, chipboard, tipped or edged boards. To compensate for the expansion of wood during the destruction between materials, several millimeters should be left. If the wood was susceptible to technical drying in advance, then such gaps can be excluded.
When installing the rafter system, it is worth considering that the calculation of the shade of the crate, as well as the thickness of the board you need to count in advance. For example, for a step of 60 cm take a board in 20 mm, and in step 90 cm - 23 mm, etc.

For ventilation, the roof of the flexible tile uses a horse, due to the installation of it on a ribbed profile. But often it does not give the necessary results and have to resort to the installation of additional ventilation elements on the roof.
After the tile is laid on the rods, ventilating elements are nailed to it, which are plastic profile with ribs. They have them every 20-25 cm.
Calculation of flexible tile
To calculate the number of holes for ventilation into account, it is worth adopting the angle of inclination of the roof of the flexible tile. If it is 15-400, then with such parameters the result will be equal to the private roof area and 300. For the magnitude of the angle of inclination in 41-850, the area is calculated by dividing the roof area to 600. Suppose the area of \u200b\u200bthe entire roof is 100 m², the angle of inclination of the roof 380 , And the cross-sectional area of \u200b\u200bthe ventilation element 310 cm².
Thus, the total area of \u200b\u200ball necessary ventilation elements can be calculated as 100/300 \u003d 0.333 m² or 3333 cm².
Consequently, separating 3333/310 \u003d 11 pcs.
In turn, to calculate the number of holes for the skate, it is enough to divide the amount of their number on the rods for two, that is, 11/2 \u003d 5 pcs. In the case of the edge of the roof, the calculation is also carried out.
If you have already calculated the square you need and are ready to proceed directly to the purchase of the material, it is necessary to take into account trimming and waste that will certainly appear during the installation. To do this, it is enough to add extra 10-15% to the result.

When calculating the material for a bunk roof, we need the following parameters:
- length 8 m;
- height 6 m;
- the angle of inclination of 30 °.
Based on this, the total area of \u200b\u200bthe duplex roof will be 8x6x2 \u003d 96 m².
Usually one pack of shingle contains an average of 3 m² (the value may vary depending on the manufacturer; each of them points the quadrature), therefore it is enough to calculate the amount of packages: 96/3 \u003d 32 packs.
Lining layer
If you want to maximize your dwelling from moisture and leaks, then the lining layer will serve as an excellent assistant in this decision. All modern standards in the arrangement of the roof says that for an angle of inclination of the roof at 18 ° and more (1/3 ratio), the location of the waterproofing layer should be strictly in parallels to the end and cornice edge of the roof. Since the probability of leakage in these places is very high.
When installing this layer, it is worth paying attention to that the technology allows laying at least 40 cm from the edge of the roof. If you bring it to the facade itself, it will be the best solution. For the skate, waterproofing is also required, which involves the installation of the lining layer on both sides of the skate at least 25 cm, which gives additional ventilation in the roof.
With the inclination of the roof angle at 12-18 °, the level of flooring of the lining layer changes somewhat. In this case, it is worth moving up, to make styling over the entire surface of the roof with a crossroads of the layer. For a faster connection of the waterproofing layer, galvanized pneumatic nails with an enlarged hat are used, driven them every 20 cm.
Eaves and end parts
After mounting the lining layer, it is necessary to strengthen the overhauls using slats from painted or galvanized metal. Fasten them on top of the waterproofing layer on cornices and ends. To do this, use special nails for the roof, driven them with a 12 cm interval.

Next lace up self-adhesive tiles, after removing a special film protection from it. Glue it flush along the cornice to each other. Finally fix tiles with nails.
If your roof has an end, it is worth putting a carpet in it, consolidating from each of its sides. If after installation, wrapping the carpet around the perimeter with a bitumen mastic, this will give the design to additional waterproofing.
Laying flexible tile
Starting itself to cover the roof of a flexible tile, very often make the same mistake. When the roof is partially covered with bituminous tiles, the difference in shades on the overall plan of the executed area begins to rush. This happens when you buy, for example 20 tile packages, moreover, 7 of them belong to an earlier party. As a result, on the roof of the tiles looks like "spots". This can be avoided using the shears of the shingle from different packs and interspersed. Then the color will be uniform, albeit a bit different.

In order to make the roof from the flexible tile to all as much as possible and in compliance with all the rules, you need to follow several rules. Gonz begin to lay from the bottom in the center of the cornice vertical rows. At the same time, the first row is placed with a gap of about 20-30 mm between the lower edge of the shingle and the tile of the cornice. In order for the drawing to be formed beautifully, the edges of the shingle in the second row are covered in the center, thereby closing the fastening of the first row. It is usually done along the edge of the front eaves and, after the adhesive strip is treated with a bitumen of about 10 cm wide.

Also, the sheet is nailed further with nails (4-5 pcs per sheet). And since the tile is stacked by layers, he lifted a nail into the first row, you strengthen the second at the same time.
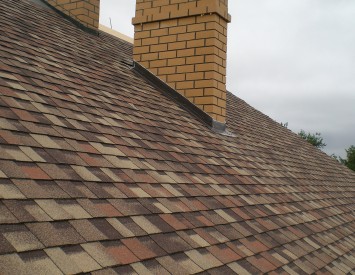
Adjustment to Flexible Tile
If your house has a chimney or other items adjacent to the roof, and such sure, this method of mounting the adjoint will be relevant for you. For example, we will analyze the chimney. Always between the pipe and the roof there is a small gap, which often enters the water, thereby getting to the roof.

To avoid this problem, they come as follows:
- to the corner between the roof and the pipe nourish the rail (better triangular form);
- tiles are brewing on this rail and pipe;
- put the rover of the endanda, starting with the pipe (with a protrusion of 30 cm);
- the pipe is placed in the apron (they are folded in a circle with sheets of galvanized or painted tin);
- the pipe is installed behind the pipe (it costs it close to the pipe to protect the roof from precipitation accumulation).
If you need to withdraw some communication on the roof, use special passing elements intended for tiles. They are nailed to the base of the roof of nails, thereby protecting it from the flows.
And finally, on top of the skate laid a special tile (skate). It consists of three perforated parts. They laid them on each other with an interval of 50-60 mm, while the short part of the skunk tiles is located parallel to the skate lines. They also fasten it with nails.
Finally, we suggest familiarize yourself with the informative video about the roof of the flexible tiles do it yourself:
Flexible tile: photo roofs


