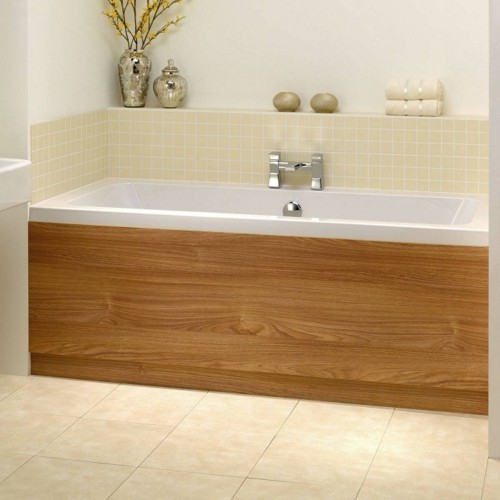
The screen for the bath is a very important element in the interior of the bathroom. Its purpose is to hide drain, water and sewer pipes located under the bathroom. And in the resulting niche you can always keep the necessary household items at hand.
Content
The plumbing store presents baths, which are supplied with the screens. This is far from always such a protection is suitable for the interior of your bathroom. It also happens that when buying and installing the finished screen, it turns out that it is not functional. In order not to spend extra money on the purchase of a finished screen, which is often made of fragile materials, you can make the screen under the bath with your own hands.
Materials for the screen
There is a huge selection of various building materials that are suitable for use in bathrooms. First of all, you should choose materials for the screen that is not afraid of moisture.
Guided by this, we will highlight the such options for the bathroom:
- from brick;
- from moisture -resistant drywall;
- lining of the space of the bath with moisture -resistant MDF;
- from plastic;
- assembly of the finished kit.
In addition to the last option, as well as the plastic screen, building material allows you to make protection for a bath without finishing. Plastic is considered practical, inexpensive and easy to work. He is not afraid of moisture, it is easy to wash, and if necessary, you can replace it with a new one.
If the task is set to set the screen under the bath of more durable materials, in this case, you should choose another material.
The screen for the bath must meet the following requirements:
- Be removable in order to have access to sewage and other communications, if necessary. It is not necessary for the screen to be completely removed. For these purposes, a small opening is left, which can be closed with a grill or door.
- There should be an isolated space between the floor and the bathroom. In addition, the floor under the bathroom and in the rest of the room should also be isolated.
- The bath should not stand on the screen.
Often, before starting the installation of the screen at home, people think about how to make the screen under the bath so that it not only serves an element of the decor, but also be functional. You can “sew” the bath tightly or make the screen sliding. In this case, free space is not lost. Inside, you can make shelves for storing detergents or install a drawer. For the convenience of operating the bath, in the middle it is advisable to make a small recess with a slope.
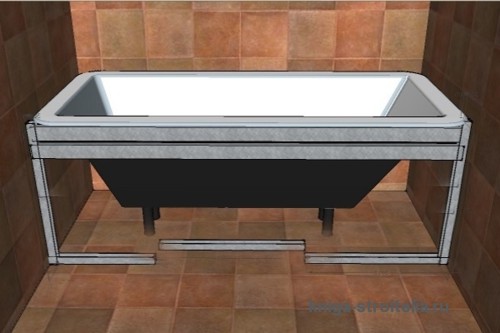
Regardless of the material and type of installation, for each screen it is necessary to install a special frame (the exception is brickwork). The grate is made of wooden rails or metal profile.
How to install a screen under a bath
Laying a brick screen
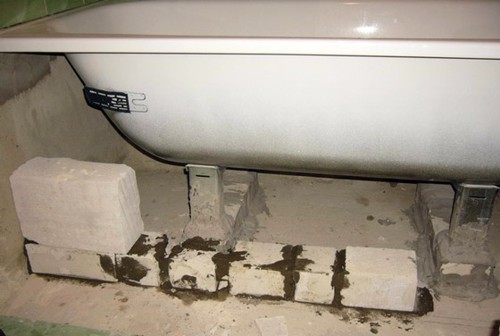
A simple option for protection for a bath is a brick screen.
Prepare such tools and materials:
- brick;
- sand;
- cement;
- water;
- container for kneading the solution;
- trowel.
You can clad brickwork with ceramic tiles, sheathe plastic or MDF sheets.
The brick screen is quite simple. Prepare a cement solution of sand, cement and water. Along the edge of the bath (from walls to wall), you need to build a brick wall half a brick.
When masonry, you should definitely “overlay” the brick. This construction term means the following: each new row of brick should shift from the previous half brick. In the place where it will be convenient for you to get to communications (sewage drain), you need to form a space. To cover the “window”, you can independently make a wood door or buy the finished one and attach it to the canopies.
Despite the strength of the material, do not rest the bath on a brick screen. When laying the wall, it is inconspicuous to leave a small space (one or two centimeters) between the wall and the bathroom. The air pillow needs to be filled with mounting foam.
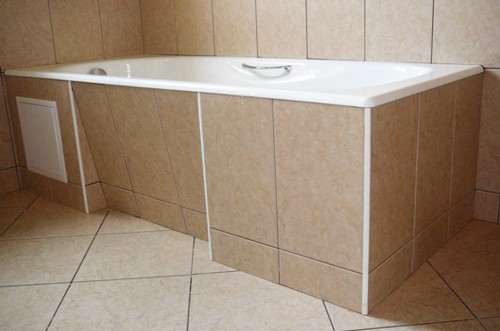
After the brick screen is ready, you can sheathe masonry with tiles, apply a layer of decorative plaster, or use another building material that will fit the style of your bathroom.
Hypsum cardboard screen
The bath screen can be made with your own hands from drywall. The installation of the screen begins with the structure of the frame.
To make it, prepare the following materials:
- wooden beam (size 40 by 40 centimeters) or metal profile;
- screws;
- metal corners;
Put the wooden rails into the corner of the bath and attach to the wall with screws. Mark the marking.
Before installing the frame, prepare wooden rails. For vertical racks, four beams of the same length are needed, for horizontal - two short ones. Use the assembly and installation of a wooden frame. Fasten the structure to the wall with screws.
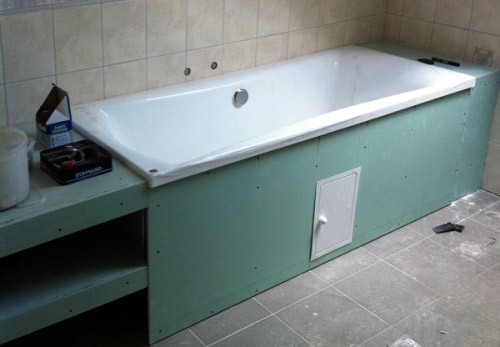
After the frame is ready, it was the turn of installation of drywall panels. When choosing the material, give preference to moisture -resistant drywall. It has a green color. Also purchase hinged loops to attach the door of the window and the lock lock (preferably metal).
Screen installation:
- Mark on a sheet of drywall.
- Cut the blanks with a sharp building knife.
- Out a place for the observation window (the size of the hatch can be different, focus on the width and length of your tile). To make the hole neatly, use an electrician. Burn the door to the hinges and attach the latch.
- Combine both panels of the future screen (clearly at a right angle) using self -tapping screws.
Now you can primer drywall with a primer mixture and clad the surface with ceramic tiles. At the discretion, you can make decorative plaster, paste the screen with wallpaper or film.
So the drywall screen will look like:
In addition to this option, you can make a screen for a drywall bath with a ledge for the legs. In this case, using the bathroom will be much more convenient. To do this, install the profile on the floor, but not at a right angle, but in the form of the letter “P” and make a deepening in the middle of fifteen centimeters. When installing the racks of the frame, fasten them under the slope.
Screen for a bath from MDF
Installation of MDF plates is practically no different from the installation of drywall. The only difference is that the slabs should be impregnated with a special solution with moisture protection. Then you need to treat the surface with a primer mixture on both sides and let it dry well. Only after this plate can be installed on the frame.
To protect MDF plates from dampness, in addition to a window for technological needs, it is necessary to make an additional ventilation hole. You can make one or two window (width two to three centimeters, length five to ten centimeters) in the opposite side of the technological window. So that they are not too noticeable, they can be closed with a decorative grate of plastic.
Plastic panel screen
Plastic is considered inexpensive and practical material. He is resistant to wear, it is simply used and he is not afraid of dampness.
To install a plastic screen, you need to purchase the following materials:
- plastic bands;
- corner;
- screwdriver;
- dowel or screw nails;
- metal profile;
- glue or “liquid nails”.
First you should install a metal frame. A feature of attaching a plastic lining is that it cannot be installed on screws, because you can break the aesthetic appearance of the bathroom. Therefore, along the edge of the bath you need to fix a wooden beam and fasten the panels on it.
In order for the design to be stronger, the metal profile must be fixed not only around the perimeter of the bath, but also in the middle. It is especially important to comply with this rule if you have acquired cheap plastic. Because even from the slightest load it can lose its shape.
In addition, the lower frame profile must be glued to the floor for “liquid nails” or sealant.
To start the installation of plastic panels, it is necessary to measure the distance and cut the strips of the desired length. It is best to do this with a special knife for drywall.
The work plan is as follows:
- Set the first strip of plastic from the edge of the wall.
- Then take the second strip (starting) and install next to the first.
- Take glue and drip the glue on the inside of the second strip. "Plant" the panel inside. It is quite easy to do this if you use a metal ruler. Gently press the strip and insert the ruler. The next strip must be inserted into the gap and carefully remove the ruler.
- Similarly, install all the stripes.
- From below, they should be fixed to a metal profile with self -tapping screws.
As a result, you get a flat surface, which does not need to be additionally sheathed or glued with moisture -resistant wallpaper. If there is a need, then such a screen simply disassemble and gain access to all communications under the bathroom.
What are the screens for the bath, you can see the photo:

