Children's room is a small world of your child, in which it should definitely reorganize the comfort and a little fairy tale. In addition to toys, comfortable upholstered furniture, physical investment walls and other little things, in the schoolchild's room, its honorable place should occupy a compact writing desk and a children's rack for toys or books. Without this interior item in the kid's room, it is practically not to do.
Content
Requirements for children's racks
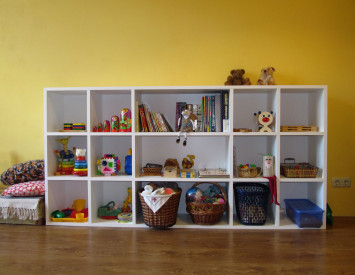
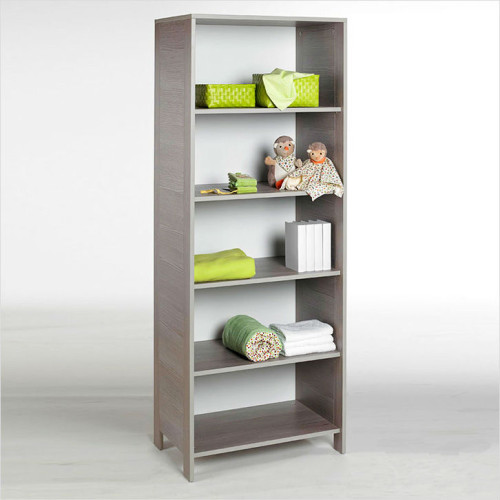
Capacious and functional - children's racks on their design are able to save space in the room or vice versa, expand and decorate it. In this compact cabinet with many shelves and partitions, you can place all sorts of children's crafts, photos, toys and favorite desktop books.
There are many different models of racks for children's rooms: among them and angular - beautifully filling free corners, gaming - for example, in the form of trainings or multi-colored houses.
Choosing a children's rack, it is necessary to pay attention to its compliance with such requirements as:
- not toxicity. Children's rack must be made of environmentally friendly materials. Experts recommend using natural wood and MDF (plates made of pressed wood chips);
- ease of use for the child. It is desirable that the height of the racking corresponds to the growth of the baby, the boxes easily opened, and the color did not annoy child eyesight;
- safety for health. Choosing a rack in a children's room, better avoid models with sharp angles, glasses and poorly ground surfaces. The rack must be strong and stable;
- functionality. It is better to acquire spacious furniture where you can distribute books, toys and things.
Examples of children's racks can be viewed in the photo:


Materials for the manufacture of racks
Owning the elementary skills of using construction tools and theoretical knowledge of furniture assembly, it is quite powerful to make a beautiful, high-quality, durable and practical children's rack.
Make a rack yourself can be from:
- natural tree;
- plywood;
- mDF sheets;
- Chipboard;
- dense cardboard.
To help with the manufacture will be a standard tool kit:
- screws of different diameters;
- self-tapping screw;
- screwdriver;
- saw;
- building level;
- pVA glue;
- hammer.
Perform painting of the finished rack for the children's room is better than ordinary oil paint.
Children's Production Technology
To start work, it is necessary to provide yourself with such tools:
- one sheet of wood fiber material of medium density (MDF) and high density (Fiberboard);
- screwdriver, drills at 12, 5, 8 millimeters;
- electric jigsaw and a tree leg;
- construction level, roulette, pencil line;
- sand paper and rag.
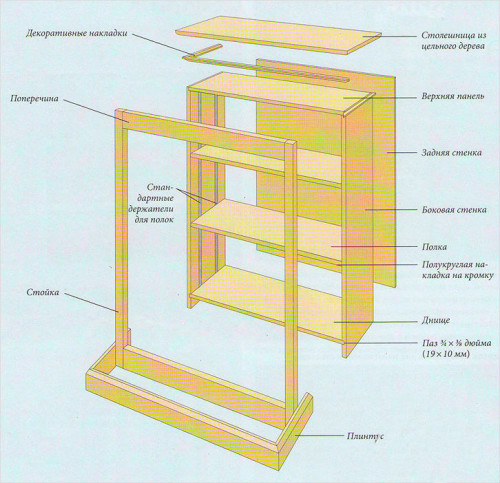
Before starting work, it is necessary to draw a sketch of the future rack. For example, this option:

Stages of manufacturing and assembling a children's rack with their own hands:
- First of all, it is necessary to cut the framework for the frame. For the shelves and partitions it is better to use MDF, and the Fiberboard is for the frame and the rear wall of the rack.
- Pencil place places for holes in the places of attachment of boards with each other. Approximately three holes on each side.
- In the corners of the design, two holes for screw screeds (config terms) are made and screw them.
- Secure the part of the rack frame to each other.
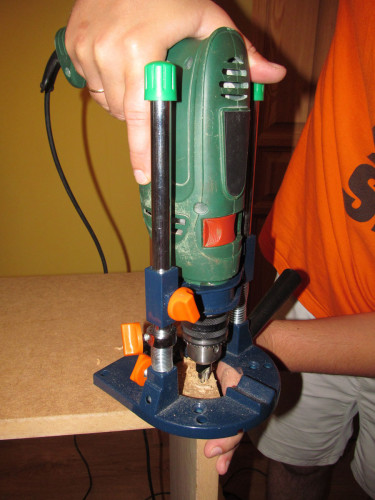
- Choose the diameter of the drill on the diameter of the wooden fasteners (waders). In the ends of the items, make holes, a depth of 25 mm and insert the wrenches. In the planes, the depth of the holes is 10 mm.
- In the same way, in other details, drill holes for the waders and connect the first number of parts with each other.
- For fastening the second row of parts it is required to drill holes with a depth of 46 mm.
- For the connection of three parts, two ducts are used. In the upper plane - a hole of 25 mm depth. Two bottom parts need to be drilled simultaneously 46 mm (24 + 22).
- The last row of the rack is manufactured on the principle of the first. The wings are inserted into the holes and parts are connected together.
- To give the fortress of the whole design, you need to screw the configures from the end side of the rack (two pieces per shelf).
- The collected rack must be painted. To do this, disassemble it on the details and proximate with white acrylic paint (or any other color).
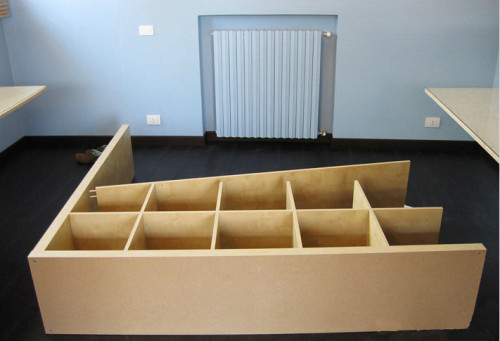
- When the details are dried, collect the rack again and attach the rear wall of the screws with screws.
- Beautiful and durable rack for children's room ready. You can move it at a convenient place and fill things.


Wooden children's rack for books
A children's rack for books from a natural tree is definitely the most eco-friendly, strong and durable option. It can be built independently with a single condition - the presence of tools and the ability to own them. Experts recommend installing wooden racks in spacious rooms, as in a small room wooden design will look cumbersome.
For such a rack, the use of a red tree is suitable, which meets all the quality parameters.
The technology of manufacturing a wooden shelving should be performed in such a sequence:
- Design on paper sketch of the future furniture object. Determine the size of each detail.
- For greater capabilities of the cabinet, make it the shelves above and wider.
- Transfer the sketch of the tree and cut the details with an electric jigsaw.
- The assembly must be started with the basics. Cartoned the thick base boards will help the self-tapping screw with a length of 3 cm. To base, vertical long partitions of the future rack are attached.
- For the shelves, thick plywood is suitable. Cut it into the details, and on the sides, place the places for the wickers (wooden locks). It is important to remember that such wooden locks are crashing only on one side of the board.
- When docking the boards with each other, use PVA glue, for reliable fastening. Additionally, fix the shelves from the outer side of the shelving by self-draws.
- After assembling all the details, you need to attach the platbands so that the rack looks more attractive.
- The rack can be painted and covered with varnish, or when desired to paint.


Cardboard remount for children's room with their own hands
Cardboard rack is less practical than wooden, but in this case such a piece of furniture will serve as decoration of the child's room and a comfortable stand for not heavy things.
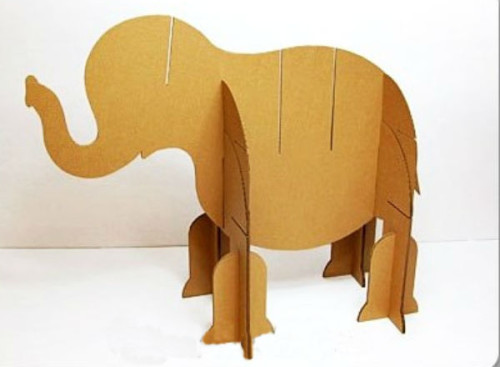
Mastery Cute baby bedside tables and racks in the form of animals is very fashionable lately. Why not experiment and do not construct your own rack in the form of an elephant.
The technique of making a rack for a children's room from cardboard consists of the following steps:
- To begin with, on the landscape sheet, you need to make an outline of elephant details with all sizes. The dimensions of this model (VHDHSH) - 82x110x52 cm.

- On three-layer cardboard sheets, it is possible to draw a conditional mesh consisting of rectangles, A4 sizes.
- Sprogit sketch elephant on cardboard and cut parts.
- For the strength of the design of all parts, it is better to cut every detail of two or three instances.
- When all parts are cut, and all the slots are made, you need to make them together.
- First, the elephant's legs are made up, then the torso, horizontal shelves, ears.
- Details are fastened with PVA glue.


Make a rack for the children's room will not be a lot of work. The main thing is to make a competent sketch, correctly cut all the details and bore them, according to our own instructions. It is not necessary to invent complex structures, you only need to make a creative approach and show a little imagination. And in the completion of the assembly, the homemade rack for the children's room can be embarrassed, fill it with different children's things, books and toys.


