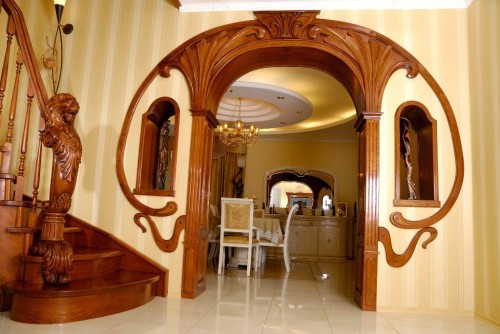
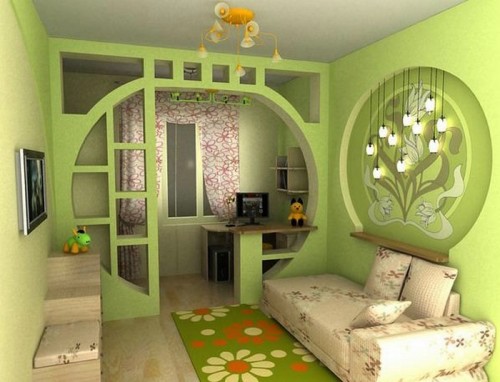
The arch has always been considered one of the most beautiful elements of the decor of the room or a personal plot. She brings a certain fairy tale and elegance to the design composition, adds the room volume due to smoothing angles. The arched opening can serve as an excellent alternative to the door, however, in some cases it is added to the arched door. Recently, wooden arches have become especially popular, the photo of which can be found in our article. They are an excellent addition to any element of the interior, and the natural tree gives the room of sophistication.
Content
DIY
The main points
Making a wooden arch at home is a rather complicated matter and requires a special tool and skills. Below we will consider in detail how to make a wooden arch with our own hands.
The first thing to learn is what the arch consists of:
- Pilasters. Pilasters are called boxed structures, which in the cross section have the shape of the letter P. This part of the arch imitates its support columns. Each pilaster consists of three main elements: a curly base representing the lower part of the structure, a ledge-handle located in the middle of the structure and capitals, which is the upper part.
- Arch. This detail is considered the founding and is a set of the entire structure.
- Archival. These are platbands that framed the design of the arch.
The procedure for the construction of the structure
The work procedure is as follows:
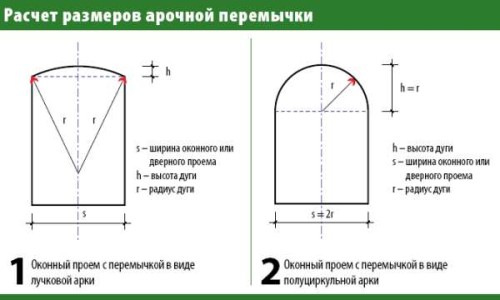
- The calculation of the wooden arch, its size and configuration are made on the basis of the width of the corridor. If it is large enough-about 2 meters, then it is advisable to make the set in the form of a part of the circle, if the width is smaller, it is better to install an elipse-shaped vault.
- Creating a template. First of all, in the manufacture of wooden arches, it is necessary to make a template of the arch of the arch. As we have already said, it can be in the form of a part of a ring or ellipse, depending on the width of the corridor. The template is made of a plywood sheet with a thickness of at least 20 mm. To begin with, we draw two circles of the required diameter on the surface of the plywood sheet. The outer diameter of the resulting ring should be equal to the internal radius of the arch of the arch. A hole is drilled inside the ring, from which we begin to cut the necessary ring with a jigsaw.
- Then we cut it in half and as a result we get two half rings. The ends of the half must be sanded. Do this on a cutter table using a run mill. From a piece of the same plywood, we cut stiffener ribs, the length of which is half a half width, and the width is the dimensions of the arched vault. We install the stiffeners between the half rings, and fix them using self -tapping screws.
- The end of the form is strengthened with thin sheet metal, plywood or fiberboard. It is better to take a sequetical segment, it is quite easily bending and will give the design the necessary rigidity. We also fix it with self -tapping screws. It is worth noting that thanks to this template, you can make more than one arch.
- Then we begin to collect the arch. For him, it is better to choose an veneered plywood with a thickness of not more than 2.5 mm. It looks attractive and is not difficult to process. We take a segment a little more wide than the dimensions of the shape and with the help of clamps we fix it on it. We grind both the ends of the plywood alternately.
- Next, we begin to cut out archivolts. To do this, collect them from small segments of wood in the form of a polygon. Then a half -ring is made from the polygon, which is glued to the preparation of the arch. The same thing is done with another architect. The entire structure is connected by clamps until the glue dries, then again grinds.
- The internal joint of the archivol and the arches of the interior wooden is milling.
- The next step is to make pilasters. They are made by P-shaped of several prefabricated parts, in order to divide them with decorative elements. The glued rack is cut in half, the grooves are cut and cut out. Then the arch is assembled completely and covered with several layers of varnish.
As we can see, for the manufacture of such a design with your own hands, you need too many specific tools, which is not entirely appropriate to buy for one arch.
The next method of making a wooden arch into an apartment with your own hands is a little more complicated, however, it does not require a lot of tools. Its essence lies in the set of the arch of several elements. To do this, a template is drawn on a piece of plywood. Then, from the boards calibrated on the flight, several small bars are sawn down the arc, which then glue together in one structure and fixed with self -tapping screws. Self -tapping screws must be drowned. The bars are marked according to the template. Particular attention must be paid to the lower arc of the bar. Lay bars with an overlap (like brickwork). After that, all irregularities are polished. Then pilasters are made. For this arch, you can use simple racks of a wooden door box. Thus, the design can be used as a wooden arch for doorways. The last step will be the manufacture of platbands and varnishing of the surface.
As we see, the construction of a wooden arch with your own hands is not quite simple, and for the implementation of the conceived reality, it is necessary to have at least a simple carpentry tool and the initial skills of working with a tree.
How to make a wooden arch for the garden with your own hands
The fashion for the decoration with wooden arches of the personal plot came to us relatively recently, however, in a short period of time, she won the hearts of the owners of country houses and summer cottages. As a rule, arches in our homes were used only as a support for climbing plants, mainly for grapes. They made them from metal, and they did not carry any architectural value. Over time, wooden arches began to be used as an element of landscape design, decorating the paths on the site. For such structures, rose flowers, decorative beans and other interesting plants are usually allowed. Naturally, in the manufacture of an arch for the garden, such accuracy is not required as for the interior of an apartment or house, so making it much easier.
Next, we will consider several options for wooden arches that can be done with your own hands:
- Simple arch from improvised materials. For the manufacture of such a design, we will use waste from sawing trees. For the racks of such an arch, we take four thick branches. We saw them down one length. Next, we dig small pits in the ground, insert the racks into them, align them in level and fill them with concrete. The part of the rack that will be in the ground is lubricated with mastic or wrapped in roofing material. After the concrete froze, tie the arches with crossbars. To do this, we cut out 6 small segments of the branches and beat them across the racks. The next step, we connect the opposite racks with crossbars. Next, install the roof of the arch. To do this, place the rafter beams and connect them in the middle at an angle. We do the same with another pair of racks. We connect the rafter beams with each other. Then we strengthen all the structural elements with braces. Such a simple and cheap arch fits perfectly into the design of your site.
- Brus and boards design. Also not a particularly complicated option. From the beam of 150x150 mm, we make 4 racks, the upper ends of which are washed down at an angle of 45⁰. The supports are installed in the ground (do not forget to process them before installation with mastic), are aligned in level and poured with concrete. Then rafters are made for the roof of the arch. To do this, the same beam is taken, the end of which at the junction with the opposite is washed down at an angle of 45⁰. The next pair of racks is connected by the arch in the same way. As a result, we have two pairs of supports interconnected by the arches. Now we connect them with each other. As slants, we use strips with a width of 50 mm and a thickness of 20 mm. They will be installed not at right angles, but at an angle of 45⁰. To do this, we drink the ends so that they coincide with the end of the rack. We install the braces on both sides of the racks, and in different directions. So the whole structure is sheathed. The result is a rather interesting arch. The final chord will be painting in white.
- Board and metal design. In such an arch, a square pipe will be used as racks. The pipe segments are treated with anticorus, set in the ground, align in level and pour concrete. Then we weld a part of the vault to the racks. For their manufacture, we take a smaller square pipe and bend it on rollers. If this is not possible, you can contact any locksmith. The resulting design is painted black. We connect racks and arches between themselves with wooden braces at a right angle. Before installation, the slapping is covered with varnish. In the racks and arches, through holes are drilled, and wooden strips are installed on bolts.
Quite often, shelves are installed on the racks of wooden arches, on which it will be possible to put flowers in wagons in the spring. True, then the design should be reinforced with the additional weight of the flowerpots.
Wooden arc
If the arch is installed in the room, then caring for it does not require effort. As a rule, the layer of varnish that is applied to the tree will allow it to have an attractive look for a long time. Another thing is the arch in the garden. To protect it from the effect of atmospheric precipitation or pests, special antiseptic compounds, as well as paints for external work, must be used. It is necessary to paint wood at least once every two years, and preferably annually. Before painting, it is necessary to clean the old layer of coating. This can be done with a spatula or sandpaper of medium grain. After stripping, wood can be covered with a layer of olifa.


