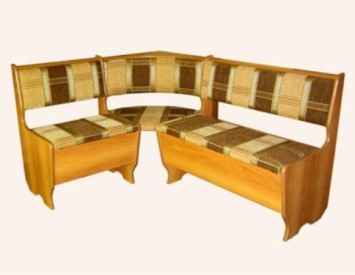
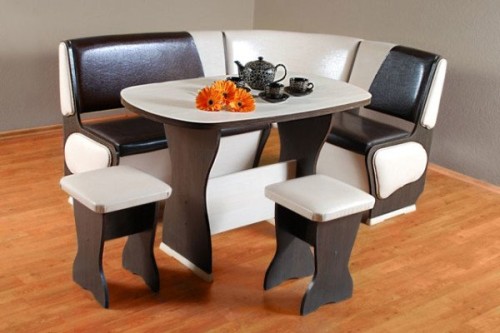
This detail of the interior of the kitchen became quite popular in the 70s of the last century. Small urban apartments in million cities gave rise to demand for convenient and multifunctional furniture. The kitchen corner became a real discovery, because it is quite convenient in its small size. Usually, niches are placed under the seat in which you can hide kitchen utensils, which is especially important in the conditions of small rooms. In addition, thanks to the kitchen corner, people can sit around the table quite compactly, without a large number of stools.
Content
One of the reasons for the great popularity of the kitchen corners is the relatively low price and simplicity of the design. In the presence of small skills in working with wood or chipboard, as well as a set of tools, such a design can be made independently. This will not take a lot of time, but it can save enough money, because in the price of a ready -made soft corner for the kitchen, up to 70% occupies the cost of its assembly services. About how to make a kitchen corner with your own hands - further.
Necessary materials and tools
Before starting work on the manufacture of a kitchen soft corner with your own hands, you need to make a sketch and choose the material.
To prepare a sketch, it is necessary to think over the arrangement of the sofa-arrangement in the kitchen. He should not interfere with free movement around the room, close access to communications, passage to the window.
When developing a sketch, it is necessary to make sure that the seat is convenient for all family members, both in height and in depth. To do this, it is enough to remove the measurements from the chairs in the apartment and make the same height.
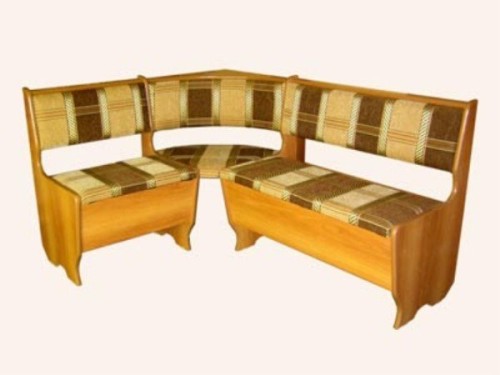
The standard corner consists of two soft sofas, which are interconnected by a connecting corner. A niche is located under the opening seat lid.
The material that is needed for work:
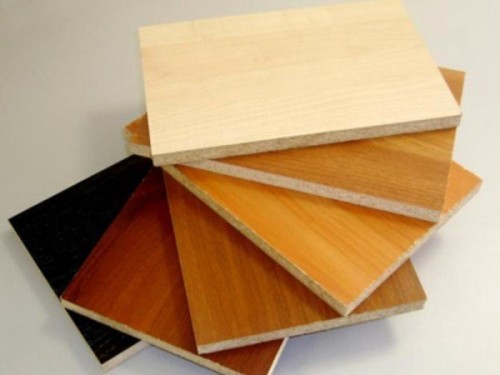
- For the manufacture of the corner frame, chipboard is required. When installing facade parts, a laminated slab is used, for hidden - polished. This reduces the cost of work.
- In order for the ends of the parts of the corner to look presentable, they are processed using the 2 mm Abs edge.
- The seats and backs of the corner will be covered with leatherette and furniture foam for the convenience of sitting on them.
- On the racks of the corner, special plastic bloodsters will be installed so as not to spoil the flooring and protect the chipboard from moisture.
To connect parts of the corner, you need to buy accessories:
- Loops for opening details. The most suitable details for the manufacture of furniture are the so -called "piano" loops.
- Confirms. These are special screws that are used to assemble furniture. Their head is stroked for the hexagonal key, so a special hexagonal key is needed to work with them.
- Squares. These details are used for invisible mounting parts. They are small wooden traffic jams. In the details that need to be connected, holes are drilled with a diameter slightly smaller than the diameter of the penet itself. Then, a little glue is poured into the holes and the fasteners are installed.
- Furniture corners. Steel corners necessary to give additional stiffness of the structure.
From the tool for such work will be needed:
- Electrician.
- Scurgery.
- Electric drill.
- Ruler, roulette, square, simple pencil, etc.
When all tools and materials are ready, it is necessary to prepare the place of work. Remove all unnecessary things so that they do not interfere.
To cut the same curly elements, it is better to prepare a template.
Do -it -yourself kitchen corner. Step -by -step instructions for making a large sofa
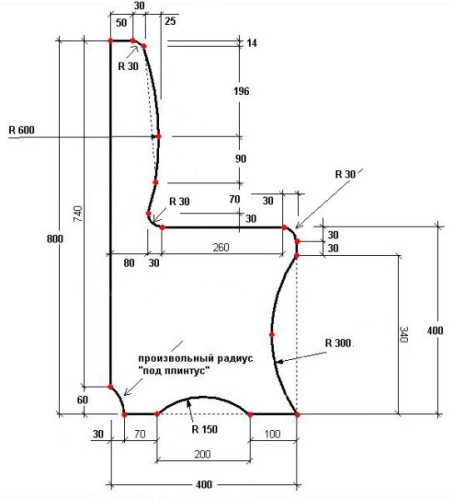
The size of the large sofa is as follows:
- Height - 800 mm.
- Length - 1000 mm.
- Depth - 400 mm.
Based on these sizes, the main elements will be cut out.
The sofa consists of several elements:
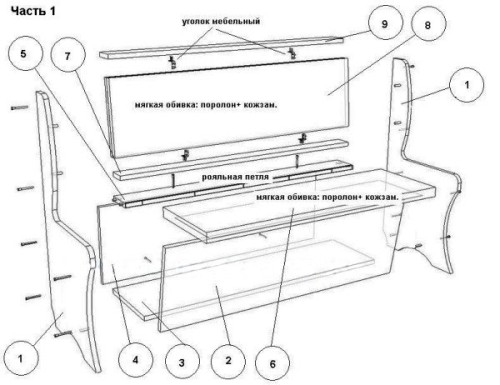
- Sideos. The main supporting details on which the entire structure of the corner will remain. In order for it to look more attractive, the sidewalls are done with milling radii, but this can complicate the work, therefore, if there is no great experience, it is worth making a little easier. After cutting onto the end, the parts are treated with an edge that will prevent delaying.
- The front part of the niche. This part is made of laminated chipboard with a glued paper edge. There is no point in using the Abs edge, since this part will not experience the load. The thickness of the chipboard plate will be approximately 16 mm. It is enough to ensure the details of the necessary rigidity. The front part of the niche is installed at an angle of 10 °.
- The wall and days of the niche. They use polished chipboard, as these parts will be hidden from the eyes, and therefore it makes no sense to use an expensive laminated plate.
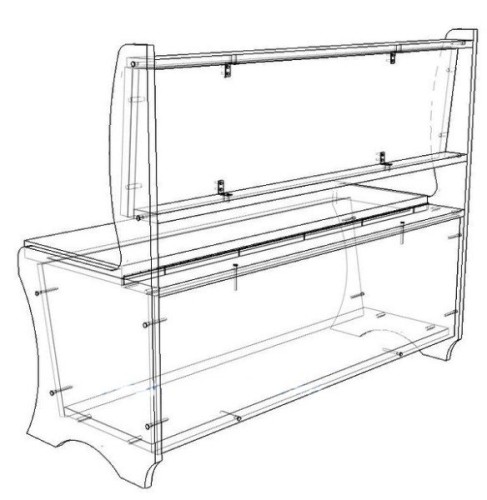
- Sitting bar. The seat cover will be attached to it so that it can be conveniently lifted. The lid will be connected to the bar with piano loops. Since this is the front part, it is made from a laminated chipboard. This part will be attached to the sidewalls using a pair of doughs on each side. This will make the fastening inconspicuous and more careful.
- The back is also made from polished chipboard, since it will subsequently be covered with leatherette and foam rubber. The size of the back should be slightly smaller than the distance between the sidewalls due to the subsequent tightening. The back is attached to the side details with a pair of confirmation. Additional strength of the back is given by steel corners that connect it to the upper and stubborn strips. The corners are attached to screws.
- Upper bar. One of the most important details. It serves to screed the sidewalls and for fastening the back. The upper bar is made of their laminated chipboard with a paper edge.
How to pull a kitchen corner with your own hands
Usually, for the convenience of sitting on the sofa, the back and seat cover are upholstered with foam rubber and leatherette. It makes no sense to use fabric for upholstery, since the leather lies is better cleaned and does not absorb fat and other pollutants.
For lining the seat, a piece of foam is cut out by the size of the seat. For bending the front edge, on the foam rubber is left to work about 20 mm. On the side parts of the seat, this is not necessary, since the lid will be poorly closed. The standard foam density for upholstery is 38 kg/m 3. It is quite enough for the long service of the product with maintaining the elasticity of the surface. Usually such a material has a pinkish tint. Foams with a thickness of more than 50 mm are quite difficult to cut off evenly with a conventional knife. In such cases, a nichrome thread can come to the rescue, heated to high temperature. The material of the smaller thickness is quite easily cut by an ordinary boot knife.
A cut piece of foam is glued to the seating surface using special glue. This is done so that he does not go in the process of lining with dermatin.
The sheathing itself does not require much effort. A piece of upholstery is cut out of the surface, taking into account the thickness of the foam rubber, its edges are bent on the back and fixed with a stapler with a step of not more than 20 mm. The corners are neatly wrapped and are also fixed by several brackets.
After the preparation of all the necessary details is completed, a large sofa is collected in a single design.
The manufacture of a small sofa does not fundamentally differ from the above process of a large part. The only difference is the size:
- Height - 800 mm.
- Length - 600 mm.
- Depth - 400 mm.
Do -it -yourself kitchen corner. Manufacturing the connecting part of the kitchen corner
Product dimensions:
- Height - 800 mm.
- Length - 450 mm.
Work order:
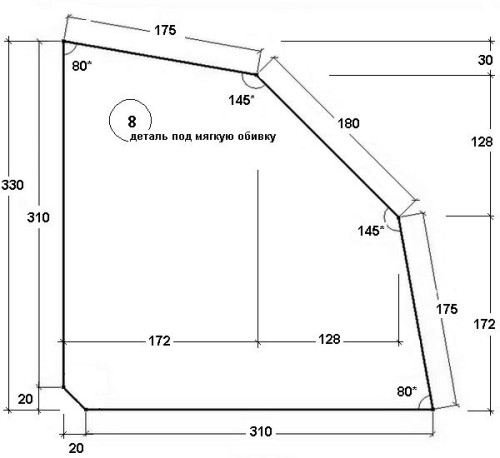
- Since this part has an angular form, its manufacture most often causes difficulties in those who do this for the first time. For the back, two curly stubborn strips are cut out, which are cut out using an electrician. The front part of the strips must have rounding to install three parts of the back.
- The corner of stubborn planks must be cut off in order to tightly put the connecting part to the wall. Since these parts will be visible, the laminated chipboard for their manufacture will be the material for their manufacture. The ends must be processed by the ABS with an edge, as they will be subject to additional load.
- Persistent strips are attached to the sidewalls of two sofas using confirmation. Between the two stubborn strips in the center of the corner, a stiffener from polished chipboard is placed, which will serve as an additional emphasis for the central part of the connecting part.
- Sitting is also cut out taking into account the angular position. The size of its side parts should correspond to the size of the sidewalls of a long and short sofas.
- Between the seat and the average stubborn strips, another stiffness of laminated chipboard is installed.
- The back of the connecting part will consist of three parts. In this case, its central part should have the form of a trapezoid to make its necessary slope.
- Before the installation of the seat and the back elements, these parts are broken by foam and leather. The upholstery process is no different from the above work with the seat and the back of the large and short sofas. True, it is worth noting that due to the wrong shape of the parts, it will be a little more difficult to do.
- The details of the back to stubborn planks are screwed with the help of furniture corners, from above and below. In this case, the back will hold tight.
- After assembling each of the elements separately, the kitchen corner is installed on its workplace, is aligned and collected into a single whole with the help of furniture bolts.
In the manufacture of a kitchen corner with your own hands, you can vary the size of the product depending on the configuration of the room.
