Repair in the bathroom is always a painstaking and troublesome process that requires compliance with many subtleties. Such a common problem as the gap between the bathroom and the wall can become an unpleasant source of mold, decay, or sowing moisture on the surfaces. Therefore, the elimination of such a gap is the first step on the path to the dry and tidy form of the bathroom.
Content
The reasons for the appearance of the gap
Often, gaps in the bathroom can appear due to the following reasons:
- The angles between the walls are not equal to 90 ° as a result of violation of the geometry of the room and inconsistencies with building standards.
- The dimensions of the bathroom do not coincide with the size of the room.
Often the problem of seamless seams can occur as a result of a violation of the technology of repairing the premises. For example, if the owner initially laid tiles on the walls, and only then installed a bath. After such actions, a gap is necessarily formed, which must be eliminated with additional efforts. This approach to the facing of the room is appropriate only if the shower cabin is installed.
Elimination of seams up to 10 mm in size
This is the most common case that every third homeowner faces. When deciding how to close the gap between the bathroom, you should pay attention to the sanitary silicon. This material is intended for reliable sealing of small joints and gaps in conditions of high humidity. Before starting work to light the seams, you will need to prepare the following:
- silicone sealant;
- large scissors;
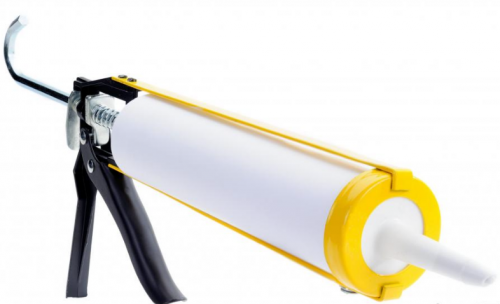
- construction gun.
Since the process should provide maximum insulation of the gap between the tiled cladding and the bathroom, it is recommended to carry out preparatory work. The essence of their execution is as follows:
- Clean the sides of the bath and the surface of the wall from the remains of previous materials and dirt.
- Carry out the desired areas using any solvent.
- Thoroughly dry the processed area.
To carry out the process of shallowing the seam, it is necessary to produce the following manipulations:
- Take the sealant and use the scissors cut the tip of the cartridge. In this case, take into account that the tube in shape is a hollow cone, and therefore the thickness of the applied seam will depend on the size of the cut opening. The more acute the cut angle, the smaller and neat, the line, and vice versa.
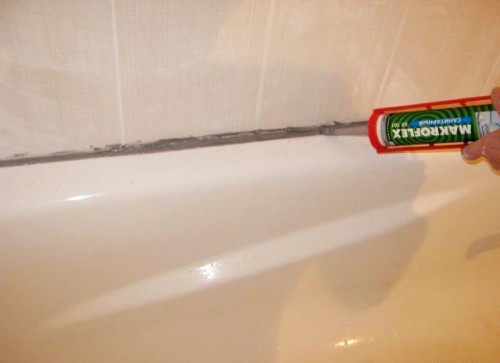
- Slowly pressing the tube on the housing, slowly apply an even layer of sealant to the joint between the surfaces. It must be continuous. If you close the gap through a plunger pistol, then smoothly press the descent, having previously combined the tip of the cartridge with a joint.
- Next, fill the gap between the bathroom and the wall tightly, while adjusting the pressure force so that the excess material does not fall out.
- Upon completion of the process, gently smooth the sealant applied with a rubber spatula or finger moistened in soapy solution.
Important! If the bathroom is made of acrylic, it is necessary to completely fill it with water before the start of sealing so that it is under load. Water cannot be drained until the silicone material dries. The best option is to light the seams in the evening, so that the bathroom stood at least 12 hours in a loaded state.
Recommendations To the process:
When carrying out the sealing work with silicone filler, it is necessary to take into account some subtleties in order for the result to the result as possible meet the requirements. Let us consider in more detail the features of working with the sealant:
- the alignment of the applied seam can be done with a finger or shoulder blade so that the joint turns out to be more even;
- when working with a sealant, the room should be well ventilated, since when the material dries, it emits acetic acid;
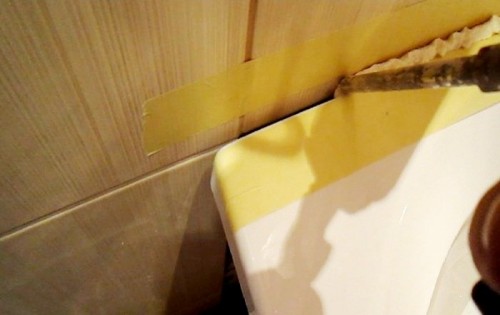
- in order not to damage the tile on the wall with excess sealant, stick paper tape along the future seam;
- you can remove the remains of silicone filler with wet matter;
- when deciding the issue of sealing the gap, than the place to gently joint the surfaces, give preference to sanitary sealant, since it has resistance to conditions of high humidity and will not be covered with mold over time.
Detailed instructions for the seaming of the seams with a silicone filler are presented on a fragment:
Elimination of gaps from 10 mm to 30 mm
The appearance of a gap between the wall and the bathroom bowl with a size of 10-30 mm is a more serious problem, but quite all possible. Experts offer two ways to solve the problem: seizing the seams using a curb tape and by installing a fillet. Consider in more detail each option.
Fastening of curb tape
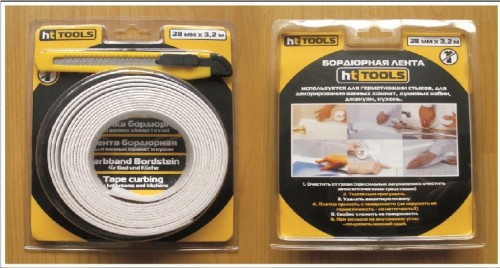
To eliminate such a gap, self -adhesive borders are suitable, the basis of which is special plastic. In this case, fixation also occurs using sealant. Let us consider in more detail the process of finding the joint:
- Initially, it is necessary to purchase a self -border tape of the required width. It is not worth taking “with a margin”, since sealing should look aesthetically pleasing.
- Clean the surface of the wall and sides of the bath with a solvent, and then dry.
- Gently draw a thin seam with a silicone sealant along the line of the future border.
- For greater reliability, apply a special adhesive mixture “liquid nails” to the tape segment, and then tightly lay the material on the surface.
- Press the tape with a rubber spatula, with the efforts of medium intensity.
Then let the curb thoroughly dry, for which exclude water from the glued material.
Detailed instructions for installing a tape-boat is presented in the video:
Installation of a tall
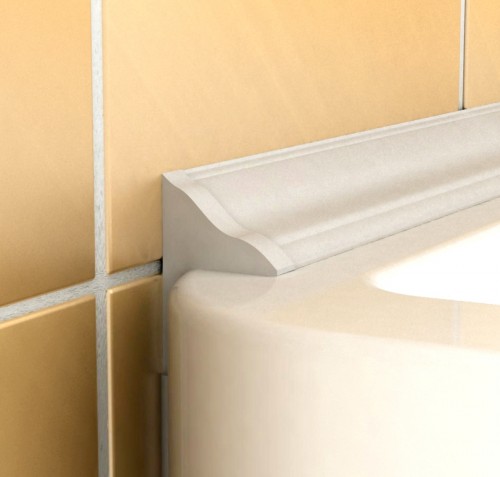
Another solution, how can you close the gaps are fixed by a special stacking line along the edge of the bathroom - filter. The device is a skirting board made of polyurethane, which is designed for operation in conditions of high humidity and does not absorb moisture. Consider the step -by -step guide for the installation of the fillets:
- Drive the surface of the wall and side of the bath with a solvent, then let it dry.
- Measure the sides in length and cut the fillets in the required size.
- Wrap the angles of the skirting boards at 45 ° with an inclination, then carefully clean the surface of the cut with sandpaper.
- Apply the adhesive mixture “Liquid nails” on the inner surface of the tall and leave for 3 minutes.
- Then attach the material tightly so that it blocks the gap.
- After that, separate the baseboard from the wall again and let it lie down for 2 minutes so that the glue dried slightly.
- Set a filler to the junction of the junction and press it as tightly to the base of the surface.
- A similar method glue the material on all sides of the bath.
- After the segments are fixed and dry, apply aquarium silicone to the upper and lower adjacency of the sides. Why moisten the brush in the composition and draw a thin layer along the baseboard.
- The seams are completed on this.
Recommendations To the process:
- To eliminate the gap of this size, the use of standard tiles is unacceptable. Use only specially designed materials.
- The installation of a fillet is carried out according to a similar principle with a corner fastening, but the difference is that a clearance of more than 10 mm will not be possible to fill the whole sealant. This is not at all necessary, the main thing is high -quality, as tightly and reliably to fix the baseboard along the wall.
- Glotting of the fillets is a rather complicated process that may initially seem easy to execute. Therefore, for the better efficiency and accuracy of installation, it is recommended to first stick on one side, and then proceed to the rest.
Seamlating over 30 mm
Despite the degree of skill of the builder and the quality of materials, the elimination of a gap of 30 mm or more impossible to produce the first or second method. Here you need concrete skills and a little mounting foam or solution.
Sealing seams with a solution
In order to seal the gap between the bathroom and tiles using the solution, you will need to perform the following actions:
- Clean the joint from the remnants of previous materials and dirt.
- If the gap is large enough, then it is naughty with an old rag to eliminate the risk of failure of the solution. In this case, be sure to soak the auxiliary material with a liquid cement-sand mixture.
- Then it is necessary to wet the area of \u200b\u200bthe future seam to increase its clutch.
- Then proceed to fill the cement-sand solution of medium density in the cavity.
- At the end of the work, let the mixture dry for 48 hours and do not expose this place by moisture.
Since cement on the wall worsens the aesthetic indicators of the interior of the room, it must be ennobled. Here you can highlight the following options for the finish of the seam:
- if the bathroom is not lined with tiles, but simply painted, then you can carefully dug the joint and paint it in the tone of the room;
- for walls with tiled trim, it is permissible to glue a special border or decorative skirting board along the side of the bathtub;
- if the room is decorated with plastic, you can fix a plastic skirting board or a border tape along the bath.
Pouring gap with mounting foam
If you do not have the time or desire to work with the solution, you can simplify the task and eliminate the gap using mounting foam. To do this, you need to perform the following actions:
- Carefully clean the junction of the junction of contaminants, and then carry out the degree of the surface with a solvent.
- Let me dry.
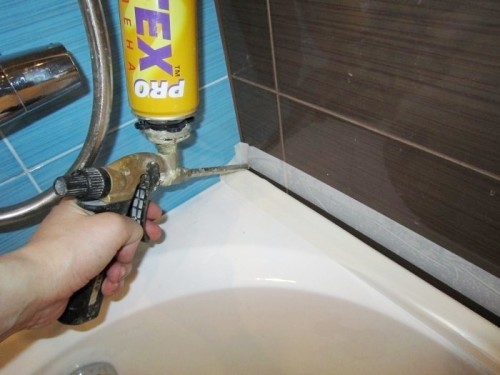
- Shake the balloon with foam thoroughly, and then apply the composition to the gap between the wall and the bathroom. Consider the fact that when expanding the foam increases to 30 times in volume.
- Let it dry for 40-60 minutes.
- Remove the excess material from the walls and the bathroom using a painting knife.
- Upon completion of the procedure, you can proceed to the shower cladding according to a similar principle with decorating the joint after the solution.
Important! To perform work, choose a waterproof foam, optimally - one -component polyurethane material.
The guide to eliminate the gap between the tiles and the bathroom is presented in the video:
