You decided to acquire fish, but this requires an aquarium. Go to the store and buy a container is expensive pleasure. Much cheaper will produce aquarium with their own hands. Moreover, you yourself will make such an aquarium that will approach you and in size and design.
Content
Why start how to make aquarium correctly? This question is asked by many novice aquarists. Before you go to pet store and buy fish, as well as everything you need for aquarium, you need to clearly understand which form will be your mini-reservoir.
Aquariums are such forms:
- rectangular;
- round;
- oval;
- square;
- angular.
Standard are the capacitances of the rectangular shape, and unusual - panoramic aquariums.
A round aquarium looks especially, it will be well harmonized with any interior, but to make it independently, at home, it is impossible. To give a rounded glass, special equipment is necessary.
Corner or panoramic containers can be made independently, and without special skills to work with glass. But still, if you have never been doing this and want to make a high-quality tank for fish, it is better to start with a rectangular shape. It is easier to make it, and subsequently it is easier to serve.
Tips of professionals
Fans of aquarium exotic advise to collect a rectangular design in such ways:
- When the walls (glass) are based on the bottom.
- When the walls are located directly around the day.
Both first and the second option are considered equally strong if the technology is complied with the construction of the design. But, there are some deviations. So, if you decide to make an aquarium by 50 or more liters, then it needs to be collected according to the second method.
The optimal size of the container is 90 by 50 per 50 centimeters. This size will allow you to contain most of the varieties of fish, provided that they will be selected in size and compatibility.
The popularity conquer the models of aquariums that do not have screed and turning, but it will be more complicated to build such a design.
Professionals recommended the overflow column in the left back of the corner, and its holes are on the same level.
It will also be more convenient if the upper edge of the column is located slightly lower than the edges of the containers walls - only 50 millimeters. Such a slight discrepancy will keep the water level slightly lower (approximately 35 millimeters) the edges of the glass when the return pump is started.
The material for aquariums is glass and plexiglass. From the plexiglas, experts do not advise to build aquariums, since over time it is muttered.
Glass selection
Perhaps one of the responsible moments in creating aquarium is the choice of glass. It is necessary to choose a certain variety, marking from m one to m eight. And M one will be considered a higher variety. If you wish your aquarium to serve a long time, choose the glass not lower than the third brand. To create a capacitance at home, a showcase glass is suitable, which can be purchased in any glass-floor or in a construction supermarket.
Choosing glass, pay attention to such moments: it should not have no cracks or scratches or any inclusions.
After the glass is chosen, it is necessary to determine the thickness. Special tables exist to select glass thickness. When you came to the store, you have already decided on the aquarium dimensions. Calculate the size of the container will help the following formula: the length is multiplied by width and height. Thus, the volume is obtained. This table helps you find out the amount of your future aquarium.

How to work with glass
If you have some materials to build a home aquarium, consider glass dimensions, which will serve the bottom (more pressure will be rendered).
Also, if the front wall of the reservoir (face) has a big length and height, then it is necessary to use the glass "ten" - 10 millimeters width. Thus, specialists are recommended in the manufacture of a house reservoir about 200 liters, with dimensions of 100 per 400 per 500 millimeters, working with glass, no less thickness than eight millimeters.
To cut the glass, such tools are needed:
- ruler;
- marker or marker;
- glass cutter;
- glass nippers;
- soft fabric;
- fabric gloves.
Before starting work, the surface must be wiped from divorces and possible pollution, wait until the glass becomes dry.

With a string glass, you need to stick the sizes, the "allowance" does not need to do.
When working with glass, it is necessary to reduce the size of the width and length equal to the length of the double glass thickness, as well as plus four millimeters on glue allowances.
To make more convenient to paint the glass, you need to purchase roller glass cutter. They are easier to work, as it gently slides on the glass, while not "jumps." Observe maximum caution!
Nuances of work:
- with a string, consider the glass thickness;
- the lid for the reservoir is also made of glass, which on the perimeter is sampled by self-adhesive ribbon;
- when working with glass cutter, it is necessary to work with pressure so that the glass is well breaking, and not crumble;
- if you do not press the glass cutter to the glass, then cracks will go and cut it problematic;
- it is advisable to practice in advance on small trimming, so as not to spoil the fragile material.
After you spend the glass cutter on the surface, you immediately need to break the glass, without waiting until it "cools." For this, the glass is put on the table so that the fracture line falls on the edge of the surface and confidently breaks the hand. Do not forget to put on the gloves or wrap the brush with a cloth.
Advice: If you purchase glass in a specialized store, you can offer the material cutting service, which is often already included in the purchase price. So do not refuse the services of professionals.
Start gluing
After the cutting glass is produced, its edges must be processed. Remember that the cropped edges can not be taken, since then they will be impossible to bind over them. For connecting joints, special silicone glue is used, which is harmless to the life of fish and other inhabitants of the aquarium.
So that the glue lay is not exactly, it is necessary to work with a "gun", which will make it possible to make a thin and smooth adhesive seam.

How to glue aquarium
Before working with glue, each wall of the reservoir needs to be treated with gasoline or turbidar, wipe with a soft cloth (not synthetic). Work on the table, and under the bottom of the future tank, put old wallpapers or several layers of the newspaper. Do not forget that when working when the process of fineness of glue has already begun, it is impossible to move the design, so choose a convenient place where the aquarium will not interfere with anyone to complete drying.
- Apply glue (or sealant) with a thin smooth layer.
- Apply the sealant on the front wall on which it will be attached to the bottom.
- The thickness of the sealant should not exceed the thickness of the glass.
- Make sure that the glue layer is smooth, without skipping, as it is fraught with the flow.
- After the glue is applied, you can install the facial part of the aquarium to the bottom. Try to work without pressure so that the liquid does not "get out" on the sides.
- If the glue sticks out from under the glass, do not rush to clean it immediately.
- Take care that the first glass sheet (facial part) does not remain without support, and only then proceed to gluing the following walls.
- When gluing the side panel of the aquarium, apply glue first on the ends of the side walls. Keep in mind that small aquariums are also difficult to glue, as more.

On the rigid rigids
Ribs that give the stiffness of the design are necessary for strength. To start this stage of work, it is necessary to wait a day or a little more, while the glue does not dry well. During drying, it is impossible to move and knock on the design.
The ribs of stiffness are thin strips of glass that will additionally serve as the strengthening of the aquarium walls. If there are edges, even with a large volume of water, the tank will not be transformed.
The standard strip size is not more than five centimeters, and the length is calculated based on their formula "three fourth length of the front grid".
Experts recommend to glipulate strips perpendicular to the side walls and the front wall of the reservoir, and solely on the side of the front and rear walls.
To attach strips, you need to put the future aquarium on the side. Loose strips with glue and attach in order each. Leave to complete drying per day.
After the reservoir will eat well, the excess glue is removed with a thin sharp knife or blade from the outside.

Everything, the work on the construction of the aquarium is made. It remains to wait about five days until it fails and only then start filling the reservoir with water. In this simple case also have its own nuances. Try to fill the water gradually, carefully pouring it gradually. After filling the reservoir to the edges, leave it for a day. If during this period there was no leakage, then it can be operated.
Often, novice aquarists are wondering what needs to be purchased for aquarium? You can answer this question in detail in the pet shop, but be prepared for the fact that the list will consist of ten or more points.
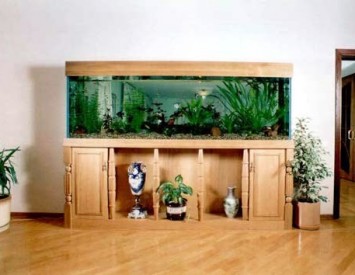
At these photos, you can see the types of aquariums:


